This is a fairly comprehensive list of the chairmaking tools I use. You DO NOT need to bring all these tools to class. I have all the tools needed if you are attending a class at my shop (except portable drills – please bring yours if you aren’t flying). If the class is at a school, I’ll be bringing or shipping plenty of specialty tools like drawknives, spokeshaves, inshaves, drill bits, etc.
Bring whatever tools you have. Maybe you would like help getting some tools tuned up. Maybe you want to practice using your own tools (some tools, especially lathe tools, can feel very different with slight sharpening or manufacturing variations). Wait to buy tools till you get a chance to see what you like during the class.
A note of warning: I use this list for every chair I teach and for every school I teach at. Some tools, however, are only used for building a specific chair. I’ve tried to note those.
Froe and Froe Club — If you must buy new I’d buy Lie-Nielsen’s or Lee-Valley’s but I like my old ones better. A 4″ diameter club seems about right.
Splitting Wedges: New wedges all seem to have big bevels at the edge that make it hard to start a split. A blacksmith can draw them to a point, or you can buy good ones used on Ebay. Just make sure the taper of the wedge continues all the way to the point, without any secondary bevels. I have a vintage USA-made Collins wedge that works nicely. It has a label like this and they can often be found on Ebay. The new ones made in Mexico may be good too, I don’t know.
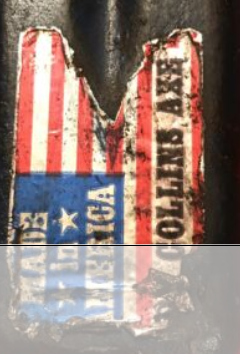
Drawknife — Barr Tools and Lie-Nielsen make nice ones, but I like old ones from Ebay. None of the new ones has a thin enough blade to allow the drawknife to fit into tight curves such as the seat’s waist. For that, it’s nice to have a blade that’s 3/16″ thick or so at the edge. My online class has lots of sharpening, purchasing and using info. Good old brands are too numerous to name: PS&W, Lakeshore, Witherby, Barton, etc.
Spokeshave — I use metal spokeshaves like Stanley #151 and the curved-bottom Boggs Shave from Lie-Neilsen (no need for the flat-bottom – the curved bottom will work for everything). Wooden bodies shaves and other low-angle shaves are superior for endgrain, but little else.
Marking Gauge — The duller the better – a sharp one won’t leave a line on green wood. I buy used ones on Ebay.
Try square — For the reaming operation, make sure it will stand upright; some tip over if the wood is worn. Heavy-bodied machinist squares are nice (less tipsy), but not necessary.
T-Bevel — Get one that locks well, like a Stanley #18. The Japan knock-offs I’ve seen are junk, as are the plastic things at Home Depot.
Bevel Board — Handy for setting the T-Bevel. Highland Hardware has a nice cheap one. You can also make one yourself or use a large protractor.
Backsaw — When I’m traveling to teach, sharp saws can be scarce.
Bench Chisel — I like a 1″ chisel, the worse it looks, the better I like it. A 3/8″ is handy for rocker slots.
Gouges — Swiss Made is a nice brand. For trimming leg tenons, use something beefy and of moderate sweep like a #3. For gutters, use a veiner — I use an 11/7. For Fan-Back and Comb-Back volutes, print this photo of my gouges and match your gouges to it. Anything that has a similar curve (is a section of the same size circle) will work, regardless of it’s width. I’d tell you what the numbers of my gouges are, but there are different measuring systems and the whole thing is a confusing mess, so just get gouges that come close to matching my curves. (If you must know, my gouges are numbered [from top of photo]: 5/20, 6/20, 8/18, 8/13, 8/10. All match Swiss Made numbering system, except the 6/20 which matches Two Cherries).
Bit Brace & Auger Bits — We’ll use 3/8, 1/2, 11/16 bits. If we’re boring without electricity or making a loop back, a 5/8 bit. On a Sack Back or Comb Back, a 7/16 bit. Read more info on my bit choices. My online class about drill bits has info on choosing, sharpening and using auger bits.
Cordless Drill — I use this to some extent for assembly, especially stretcher mortises. School drills can have dead batteries (and I don’t have enough drills for 4 students), so you might want to bring your drill.
Kreg Jig Micro Bit (3/10″ diameter) — I recently switched to using this bit for all angled holes in backs (Loop Back, Continuous Arm, Sack Back, etc). Amazingly, it works great both in a brace or a cordless drill. Read more info on my bit choices.
5/8″ Brad Point Bit: I use these for stretcher mortices, since an auger bit tends to tear at such a steep angle. I make them from twist bits (it’s amazingly easy). More info about making them. At one point, Charlie Ryland rylandwoodworking@gmail.com was making bits like the ones I make. Maybe he still is. Lee Valley’s bits are really nice and the point is long enough that you can make them work (it’s not as long as I’d like, but it’s longer than most brands). You can watch me grind them on my online class.
18″ Auger Bit Extension — Used for stretcher and spindle mortises when boring without any power tools. Ebay has them cheap. Millers-Falls made a nice one, but all the ones I have work well.
Scrub Plane, Bench Plane — For flattening the seat.
Sharpening stones and slips — I have some in my shop you are welcome to use. Schools sometimes have them.
Dividers — Useful for measuring leg depths. I like old ones, such as the ones made by ps & w.
Dead blow — For assembly. I also really like split-head hammers.
Card Scraper — Learn to sharpen them here.
Adze — I rarely use one, unless I am carving hardwood seats. You want one with a good shape and a good amount of weight. Jason Lonon makes good ones. The antique one I use has a long handle and I stand on the seat as I carve – it can really hog some wood off. Good used ones are rare. Beware of gutter adzes which won’t fit in a seat without modification, since they are incannel and have little curve front-to-back.
Inshave/Scorp — Barr’s inshaves are the best right out of the box (either one is fine) . The one made by Ray Iles is great, but you need to bend the handles up with a torch so they don’t hit the seat as you carve. Easy enough if you have a torch. Wrap the handles and the blade with wet towels so they don’t get too hot. Good used ones do exist, but are rare.
Travisher — Get one from me, Claire Minahan or James Mursell, or make your own. I’ve never seen a good used one for sale.
Turning saw — The 18th century version of a bandsaw. You want a big one, 28″ or so.
Coping Saw for rocker slots
Extension folding rule — Useful (but not mandatory) for measuring stretcher lengths and what not. They are cheap on Ebay, and better than the new ones.
Pencils — Schools often don’t have enough pencils, amazingly enough.
Notepad, Camera — A camera is great way to take notes.
Safety Glasses — Imperative when using metal wedges and a metal sledge hammer. I have plenty of glasses in my shop, but yours may fit you better.
Reamer — Needs to be 6-degree included angle to match my turnings. You can make one (information at greenwoodworking.org or my videos), or buy one from me or Tim Manney.
Leg and Post tenons — 11/16″ & 1/2″ (tapered at 6 degree) Tenon Cutters for legs, posts and arm stumps. Turning tenons on a lathe with a skew chisel is probably an even better option.
Spindle Tenons – 1/2″ Tenon Cutter for bottom of spindles. Dowel plate for top of spindles
Stretcher Tenons – In my shop, I prefer using a turner’s gate for turning tenons (it makes it easy to remove the shoulders and the tenons are always aligned with the stretcher’s axis). My second favorite method is a dowel plate, which is cheap and low-tech. For expediency, I use a 5/8 Veritas tenon cutter in large classes.
Turning tools — In most classes I teach we won’t get to do much, if any, turning. That said, for baluster legs, I use a 1/4″ spindle gouge, 1/2″ oval skew, 3/4″ roughing gouge and a parting tool. Bobbin turnings are the same, except you can use a 1″ or larger skew (safer), and you don’t need the spindle gouge.
Lathe Calipers – Good used ones (Starrett, Brown & Sharpe, etc) are available on Ebay cheap.
Flush-cut Saw — Used on loop back chairs and nowhere else. Lee Valley’s works well.
1/4″ Morticing Chisel – Used on Velda’s chairs.
Rasps and Files for carving Comb Back knuckles
Block Plane for gluing on Comb Back handholds
12″ round file (1/2″ diameter) for reaming spindle holes in the Comb Back arm. Also called a rat-tail file.
Finishing:
1.5″ Sash Brush with synthetic bristles from any good hardware store. Purdy is a good brand.
Milk Paint I use the Old Fashioned brand
Shellac Flakes I use the flakes www.shellacfinishes.com sells. Any kind of wiping varnish also works well.
Carnauba Wax The only wax I have found that doesn’t leave white spots in oak pores when applied over shellac is a liquid wax sold by BioShield.
Instructions for making some of the bigger tools:
A nice shaving horse: Tim Manney has designed a simple shaving horse that works really well.
Free Workbench Plans: Curtis has free plans for his workbenches, which are similar to mine (mine are a little bigger and disassemble easily).
Kiln: I have some blog posts about making a kiln.
Steam Box: My blog has a series of posts about steam boxes.
Favorite books from my library:
The Chairmaker’s Notebook by Peter Galbert is the most comprehensive book on Windsor chairmaking in print.
Understanding Wood by Bruce Hoadley is an indispensable reference about why wood behaves as it does. Read chapters one, two and four if you read nothing else on chairmaking.
Turning Wood with Richard Raffan is a good general woodturning book for both spindle and faceplate work. Info on the skew is rather thin.
Understanding Wood Finishing by Bob Flexner demystifies the various kinds of finishes. He puts more faith in thick glossy finishes than I do, but the info is excellent.
The Perfect Edge by Ron Hock is an excellent book on sharpening. However, getting a usable edge is an easier task than the myriad lengthy books on the subject would have you think.
Nancy Goyne Evans has three excellent books on the history of American Windsors and Windsor chairmaking.
The Nature and Art of Workmanship by David Pye is a brilliant book of craft philosophy. Why does a glossy finish on a rough board look bad? What is the difference between hand and machine work? This book tackles many such questions in a logical manner.
Roy Underhill’s TV show and first three books were what got me interested in this crazy profession. An antidote to all the technical books in the world, Roy’s black-and-white photos and whimsical writing are like a window into another time.