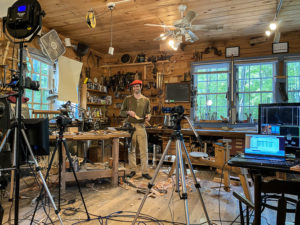
DEMOCRATIC CHAIR SERIES with CURTIS BUCHANAN & ELIA BIZZARRI
Elia is joined by Curtis Buchanan in this class series on building the Democratic Chair–a chair of Buchanan’s design that blends modern design and simplistic technology. These are each full 2-hour recordings of the live-streamed online classes. Make a donation for the video you would like to watch with the button below each description and you will receive an email with a passcode allowing you to view and/or download that recording. Alternately, you may purchase the entire series for $100. Email Seth with any questions.
ALL SEVEN EPISODES – $100
DEMOCRATIC CHAIR PT. 1: STRETCHERS, POSTS AND LEGS
Curtis Buchanan discusses his Democratic Chair plans and we show you how to create the stretchers and spindles. We talk about wood selection and how to split the parts out, then whittle as many parts as we have time for. At the end, Curtis answers students’ questions about tool techniques, wood storage and more.
DEMOCRATIC CHAIR Pt. 2: WHITTLING SPINDLES AND BENDING THE CREST
After whittling the spindles and crest, we bend the crest and talk about drying the parts. Q&A.
DEMOCRATIC CHAIR Pt. 3: PLANING THE SEAT, BORING AND REAMING MORTICES
While our green parts dry, we plane the seat and then bore holes for the legs and posts and start reaming the holes to fit. Q&A.
DEMOCRATIC CHAIR Pt. 4: CARVING THE SEAT
We saw out the the seat with a bowsaw, then carve and bevel the seat using the inshave and drawknife. Q&A.
DEMOCRATIC CHAIR Pt. 5: ASSEMBLING THE UNDERCARRIAGE
We bore stretcher mortises, measure stretcher lengths, cut tenons and assemble the undercarriage. Leveling the legs is also be covered. Q&A.
DEMOCRATIC CHAIR Pt. 6: BACK ASSEMBLY
We bore crest mortises in the posts, tenon the crest, bore spindle mortises, then tenon and clean up the spindles. We have the chair fully assembled by the end of this class. Plus Q&A session and a bonus video of Elia repairing his undercarriage from Pt. 5.
DEMOCRATIC CHAIR Pt. 7: MILK PAINT FINISH
Curtis and I talk about painting spoons and Democratic chairs with milk paint. We cover preparing the surface for paint, mixing and applying milk paint, brush choices, crackle finishes, rubbing the paint out to create a sheen, and top coat options. Q&A.
DEMOCRATIC PLANS, MATERIALS AND TOOLS
CHAIR PLANS We strongly suggest that you get a set of Curtis’s plans for the democratic chair. The download is available on a donation basis or you can purchase a hard-copy for $60.
MATERIALS The entire chair can be built from a 25″ long section of strong, easily split wood such as oak, ash, or hickory. (ideas for green wood sources can be found on my blog). Plus you’ll need a seat of easily carved wood like white pine, basswood or tulip poplar (I have links to seat suppliers on my Resources Page).
TOOLS: I have compiled a minimalist tool list for this class. Of course, you can tool-up infinitely; I have a larger and more generic tool list to help your tool-buying habits meet their full potential.

