I recently posted about drill bit varieties for chairmaking and got a number of comments about Wood Owl bits. I had never used them, but someone kindly sent me a couple to try. Here’s what I found:
There is no such thing as a perfect bit. Designing a drill bit is a series of compromises. Do you want extremely low power use or extremely clean holes? Do you want the bit to be easily steerable, or do you want it to track well?
I feel one of the main requirements for a chairmaking bit is a very clean entry hole at steep angles.
At first glance, the Wood Owl bit is a lot like a tradition auger bit, except it has three flutes rather than two.
I tried a perpendicular hole in some oak and it did well. But many bits will make a clean perpendicular hole (forstner, auger, bradpoint, spade, etc), so this isn’t much of a test for a chairmaking bit.
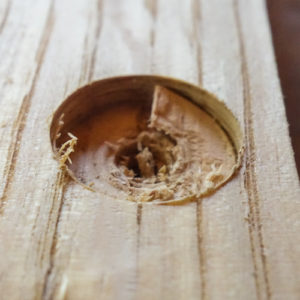
Here’s the hole it made. Not too bad.
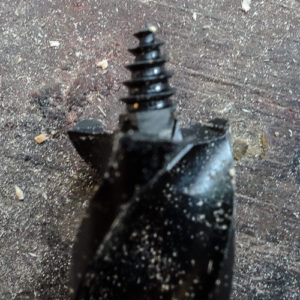
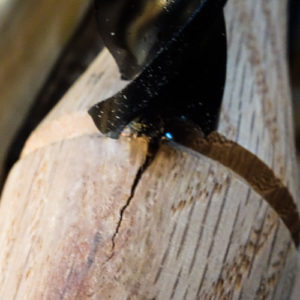
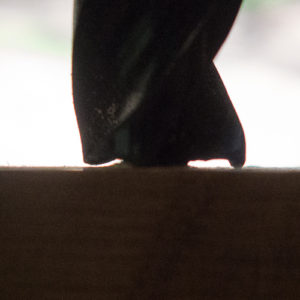
I picked up a scrap maple leg and tried boring at a 15 degree angle with a 5/8″ Wood Owl – pretty standard for Windsor stretcher mortices. To my surprise, the leg split far beyond the future mortice.
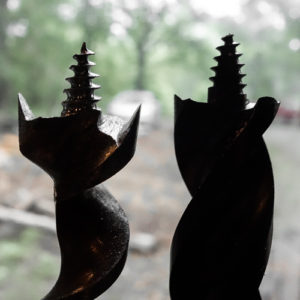
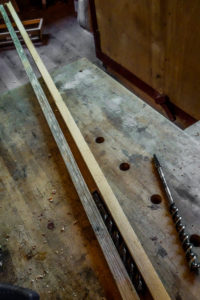
On the left is a Irwin pattern auger bit, on the right a Wood Owl bit. Notice that triangular core of the lead screw is wider on the Wood Owl bit than the Irwin. This is what is causing the mortice to split. It may also help prevent the lead screw from stripping out of the wood, but for chairmaking purposes split mortices will only get worse when the tenon is driven in.
I also tried it in a red oak leg, to make sure I wasn’t fooling myself.

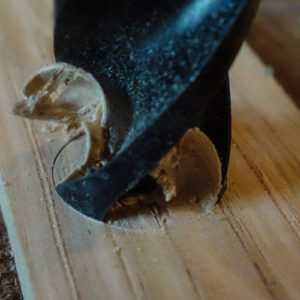
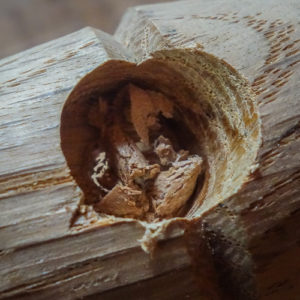
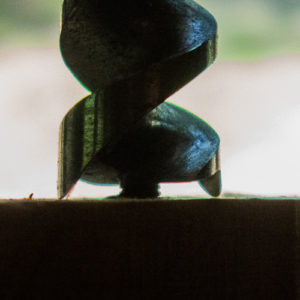
Back on my maple leg, I tried drilling the 15 degree hole deeper to see if I’d get a clean entry. You can see what is happening here – the right-hand side of the bit is cutting a hole, but the fibers on the left-hand side haven’t been severed by the spurs yet and are being torn past where the mortice is going to be.
Similar problems with my oak mortice.
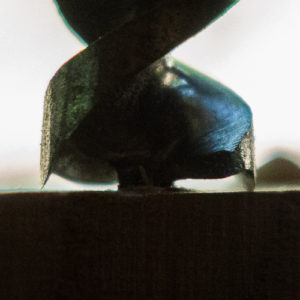
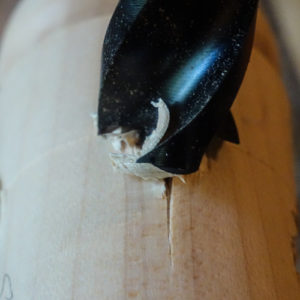
Look at this standard Irwin bit, drilled into a block of wood till the spurs just start to touch the wood. The horizontal part of the bit directly above the wood is a cutter that removes the chip (“bottoming cutter”). The amount of light showing between the block of wood and the bottoming cutter shows how much higher the spurs are than the bottoming cutters. The higher they are, the less likely the bit will tear in steeply angled holes.
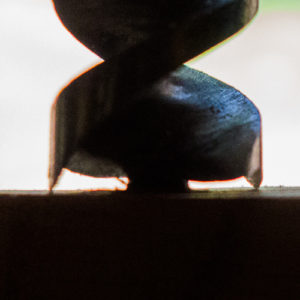
The Wood owl’s spurs are much shorter than the Irwin’s, which is why I was getting tear-out. This also has a major advantage: it greatly reduces the amount of power required to drive the Wood Owl bit. Imagine using a knife to score a piece of wood. The deeper you want the score mark, the harder you have to pull, right? Well, the spur is simply a knife mounted to a drill bit.
Auger bits were made with varying spur lengths and spurs get shorter with sharpening. Spur length is one of the first things I look at when buying old bits. This one has long spurs.
This one has somewhat shorter spurs, but they are still quite a bit longer than the Wood Owl’s.
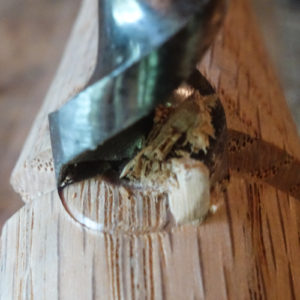
And here is the auger bit cutting a nice clean 15 degree hole in a red oak leg. Note how the chip on the right is splitting out along the grain , but the spur had done it’s work and the split is not proceeding outside the hole. I usually use bradpoints for stretcher mortices since even augers sometime pull a chip, but this auger did quite well this time.
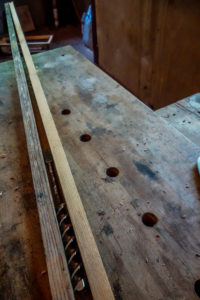
One last thing to know about auger bits: they are tapered. See how the two wooden battens touch at the far end? The taper helps prevent the spiral flutes from lifting a chip if you change the angle of the hole slightly whole boring.
No taper on the Wood Owl bits.
It seems to me that the Wood Owl bits were designed to be an easy to power bit, rather than a ‘really clean hole’ bit. I used mine for drilling holes in my new timber frame shed today and it worked amazingly well – my little electric drill had no trouble powering them through 4″ of oak beam. What a joy!
I just had a cancellation in my August 13-18 Loob Back chairmaking class. For the first time, Seth will be providing amazingly delicious home-cooked lunches every day. I’m excited! Visit my teaching page for more info.
Hi Elia,
Were you using it in a hand brace or electric drill. I’ve used these bits successfully on spindle and post holes in seats and on legs and stretchers with clean entry holes using a battery powered drill. I have the drill going at full speed on the low setting. I thought the lead screw might be too much but I’ve done two loop backs with them so far. When I tried them in a hand brace I ran into problems.
Thanks!
Interesting point! I was using a bit brace. I’ll try it with a cordless drill and report back. Thanks! Elia
Very informative review. It puts the infomercials in one of the magazines to shame.
Thanks for the effort and analysis, it’s spot on.
Appreciate the information on the Wood Owl bits and the traditional auger bits. The clarity brought by someone like yourself who uses these and why is informative in a relevant context that educates people like myself whom have had only limited experience with a bit and brace (even though I have quite a few because nobody seems to want them ). Thanks again, I will keep in mind the factors mentioned next time I use them.