 I just started a fun job. A customer wants two copies of this early 19th C. barstool. I love getting to spend time with old chairs like this – there is so much to learn. Last week I turned the turned parts and bent those that get bent.
The new and old chairs will live side-by-side, so I decided to make the new chairs in the same manner as the old, rather than using modern standards of precision, surface quality, etc. I asked my friend Peter Ross for advice. He has spent his life reproducing 18th. C. objects, 25 years as head-blacksmith at Colonial Williamsburg and now in his own shop near me. His paraphrased advice: “If you ‘improve’ the chairs, they will look like having only one white-wall tire on a car.”
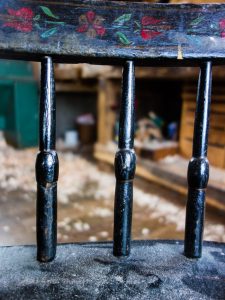 A closeup of the spindles. Notice how much variation they have. The guy was clearly a good turner, but he wasn’t spending time fussing over them. These parts were turned by someone who was likely turnings thousands of them using the best practices of his time. It might have taken him a couple minutes to turn one of these.
 Peter said that many reproductions are rough for all the wrong reasons, and that it may take some fussing to get the parts to look ‘free’ in the right way.
To me that means this: It is not an accident that the parts/chair has the shape and surface it does. To get the same look you need to use the same techniques, at the same speed and with the same tool control as the guy who made the original. Kind of like learning to forge a signature, and it’s about as easy.
I made a little story stick for the spindles, but to get the right variation I had to ignore most of it. I made two lines where the bead is and marked nothing else.
 First, I slowed down the lathe as slow as it would go, to try and get as many tool marks as I could. At 1000 rpm it still wasn’t slow enough, but it had to do. Or I may not be fast enough, at 3-4 minutes each.
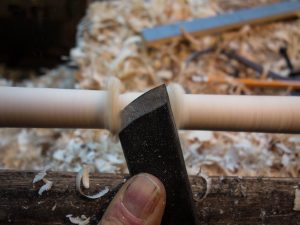
If I wanted to precisely control the size of the bead, I would make ‘V’ cuts where my pencil lines were. Instead, I just rolled the bead in two quick cuts with a big skew. From what I have seen in old videos, many traditional turners used a big skew for practically everything.
 The original spindles slightly taper down to a neck on either side of the bead. The large skew seems to answer why. In one pass, a gouge could cut a cylinder on either side of the bead, but a skew would rather cut a taper.
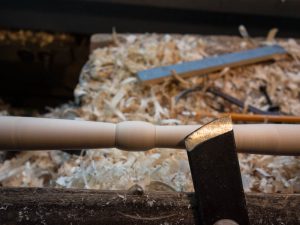
 Now, working out from the bead, I turned the ends of the spindle down to size. But the skew can’t work right up to the bead in this direction (the tip would catch), so I’m left with a little neck, just like on the originals. The neck also serves make the bead look deeper, without having to remove much wood.
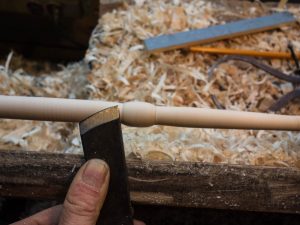
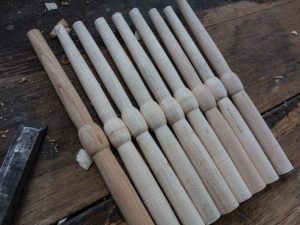 My finished spindles. Plenty of variation and even a riven surface left on one of the beads somewhere.
Donations
To my surprise, several folks have asked for a way to donate to my blog. I’m not in the habit of turning down free money, so there is now a ‘Donate’ button on the sidebar of my blog. No pressure!
0 Comments